Building a raised bed planter
If you've read part one of this series, you'll know that we've recently moved and build a custom raised bed planter in our garden. I sketched out the entire thing in CAD before and over Easter weekend, we set out to build this thing. Did my CAD model help us? Did we buy the right amount of wood? Was it worth it? How much did the entire thing cost? Read on to find out!
For reference, this is what we were trying to build: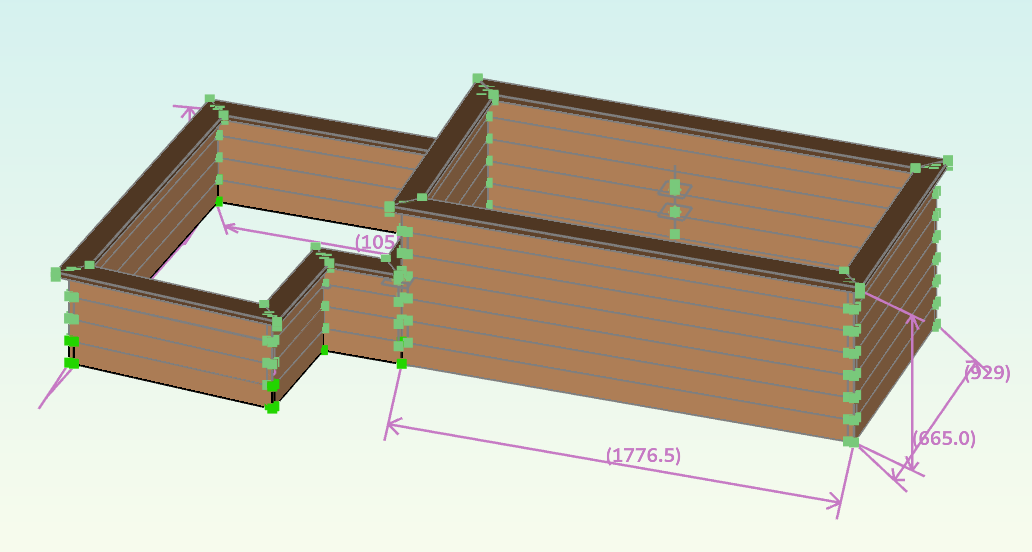
getting the materials
Before we can start building, we need to source a bunch of materials. Initially, we planned to just buy everything at a local hardware store chain but wife's parents suggested reaching out to a smaller lumber dealer in the area. This turned out to be a great call as the hardware store wood costs almost twice of what we paid. Still, I had to buy a bunch of stuff as this was our first larger woodworking project so I couldn't rely on leftovers from other projects.
In the end, we bought:
- screws (5x50 & 5x2)
- steel cable & mounting utils
- concrete tiles
- smaller pavement stones
- pond liner
from the hardware store.
For the lumber, we went with European larch as it's local, very robust and not too expensive. I measured all lengths in the CAD model and tried to optimize them onto 2m lengths as the car we used to transport the wood only had limited length. We ended up with 40 planks of size 2m × 10cm × 2.4cm plus 12 corner posts sized 5cm × 5cm × 75cm. This would leave us with enough spares to mess up and it was easy for the lumberyard to cut as their stock was 4m long.
We ended up paying €140.00 for the wood which was way cheaper than expected.
laying the foundation
Placing the planter on the ground directly is a bad idea as it would sink in over time and start to rot from below. To avoid this, we decided to build a foundation out of pavement stones. Initially, I wanted to get a head start on this but in the end, I didn't have the time so this was the first thing to do.
Digging out the area was a lot more work than expected. Getting everything level even more so. If I were to do this again, I'd probably borrow something to compact the ground but we made do by digging out more than needed and filling back in selectively.
Excuse my boomer-like photo skills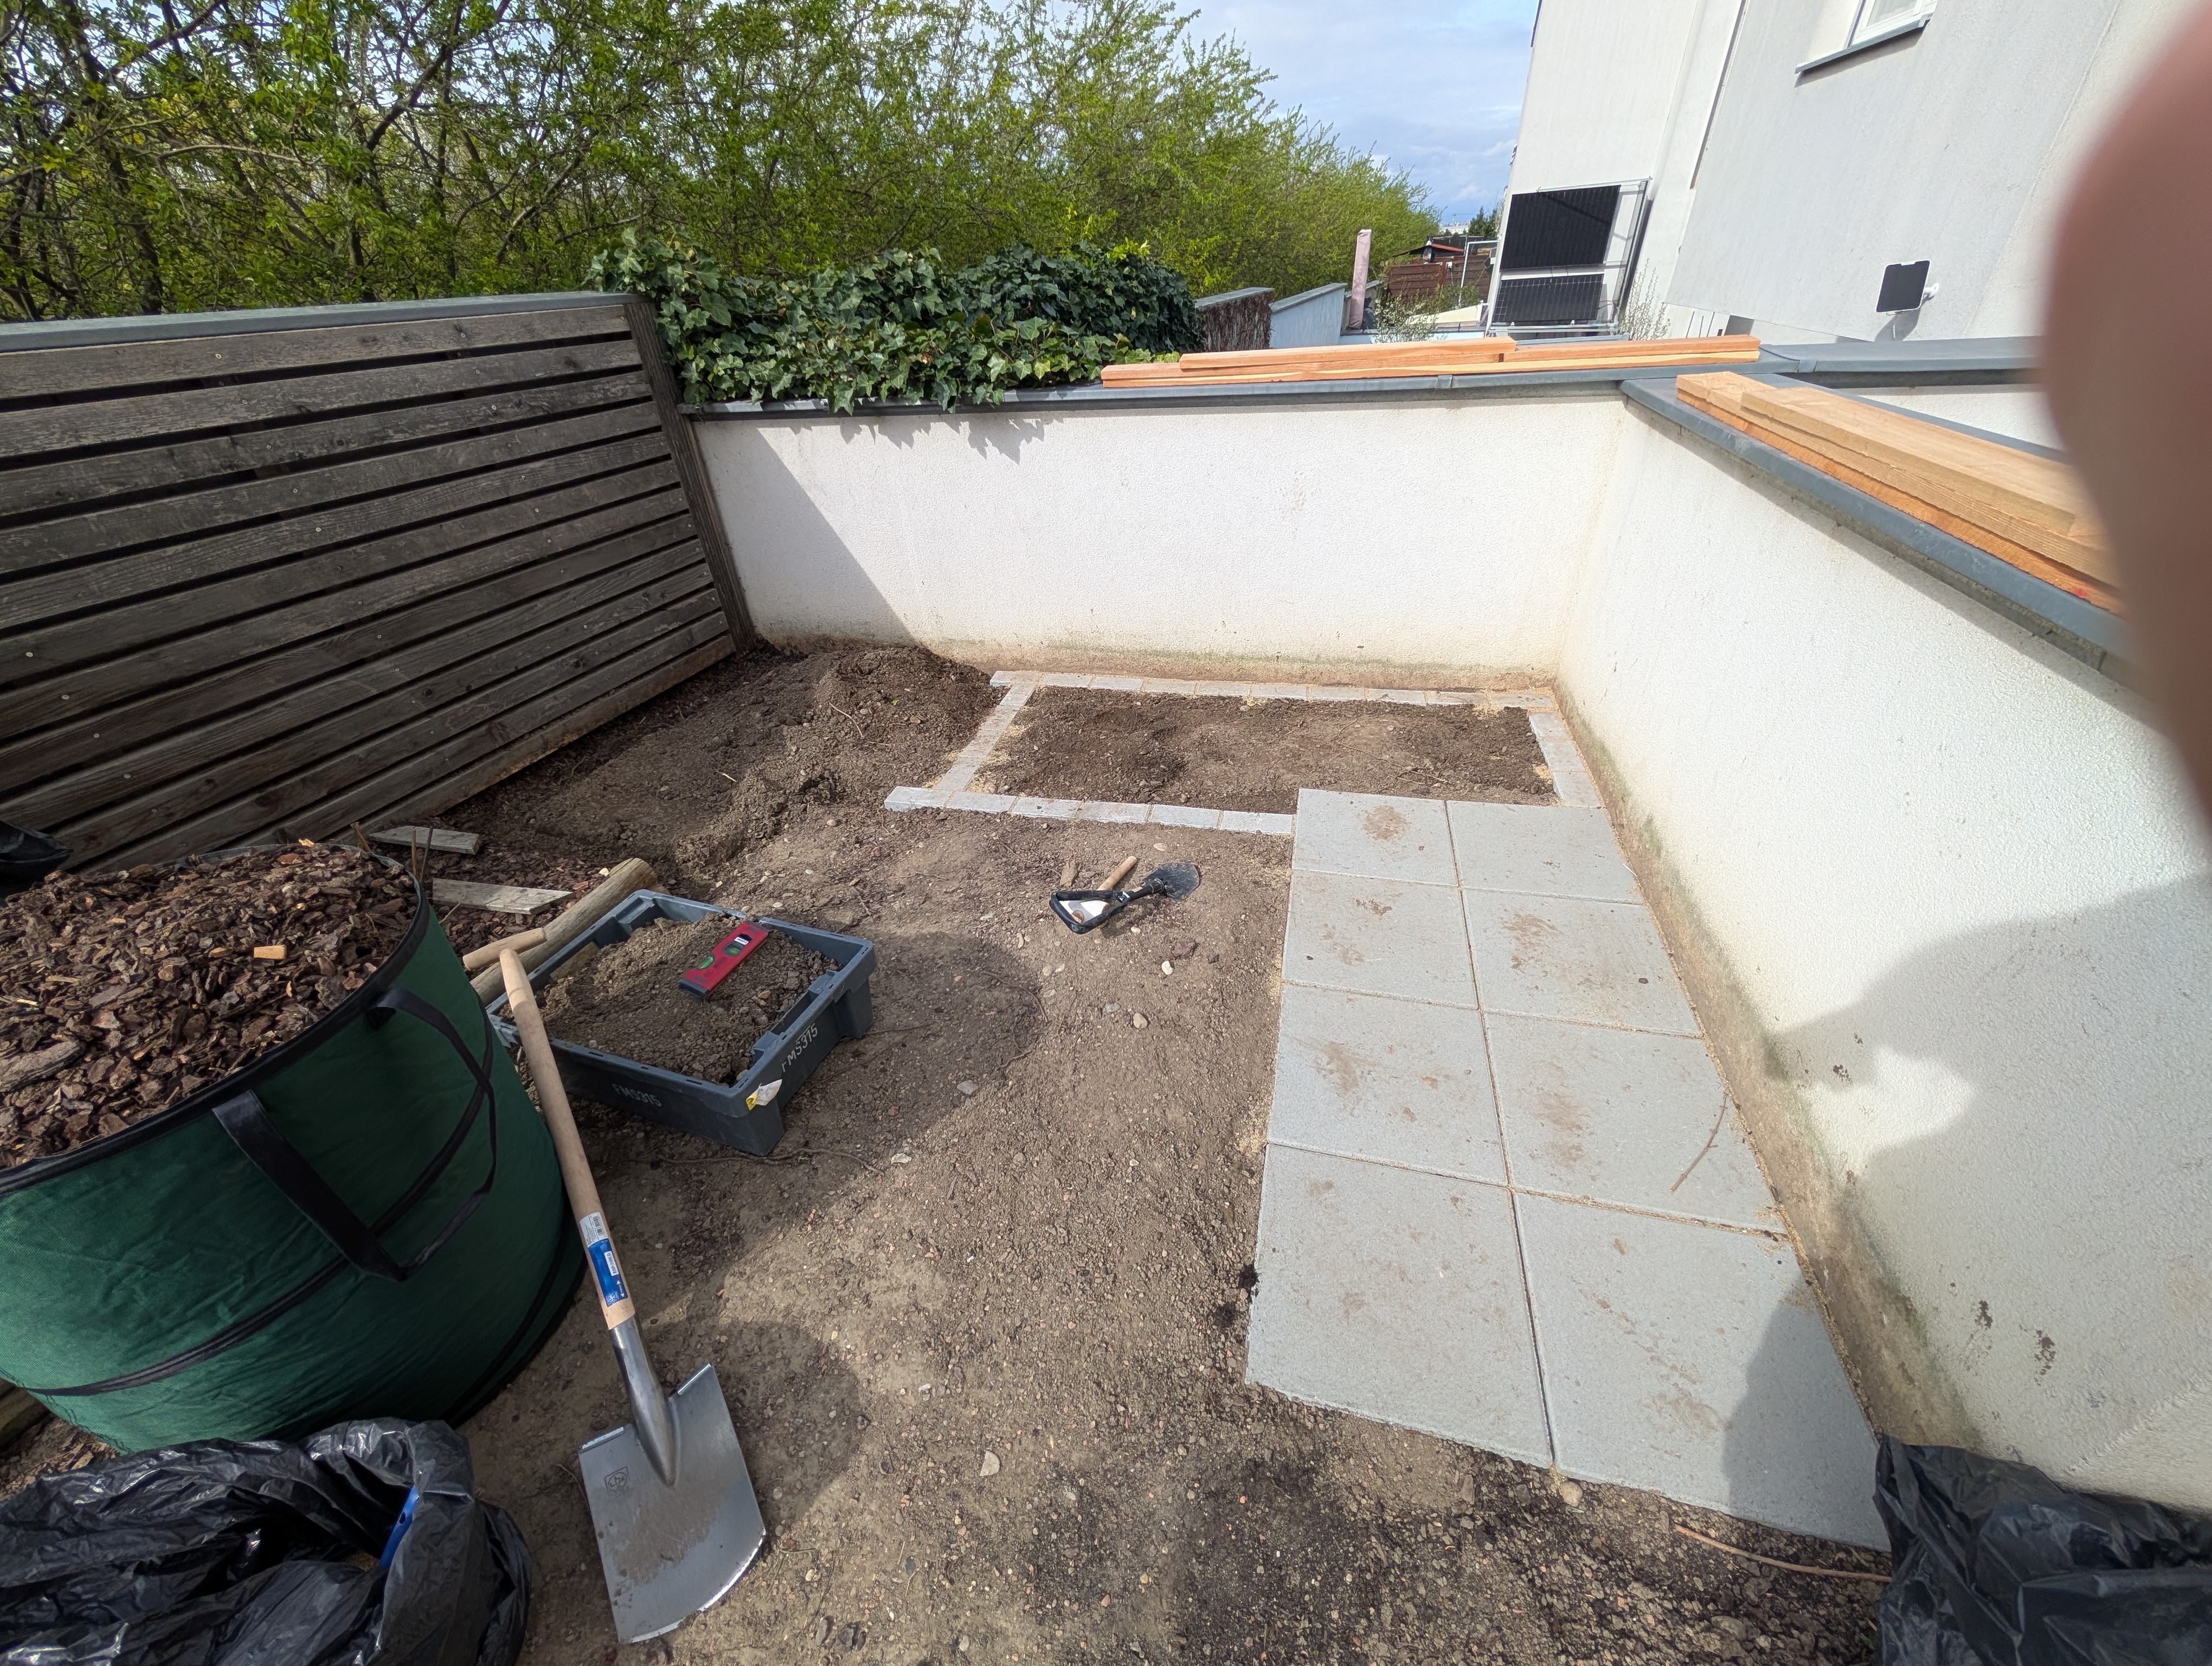
Since we only had one rubber mallet & water level to even out things, one of us started cutting the planks to size for the first planter.
building the first planter
After working on the foundation for multiple hours, it was clear we were not going to finish everything in one day so we decided to focus on the right side of the planter first. It's just a box, how hard could it be?
To simplify things even further, we changed up the measurements from the original plan to work with nicer numbers. This meant, we'd need to adapt the sizes on the smaller part a bit but at the level of precision we're working, we would have had to do this anyways.
Not all planks were made equal so after cutting, we grouped them together in "rings" of equal size and marked everything. We screwed together the short planks first, alternating between overextending planks on the left and right side. When it came to joining both sides with the long planks, we ran out of space on our patio and had to improvise by building around our toolbox.
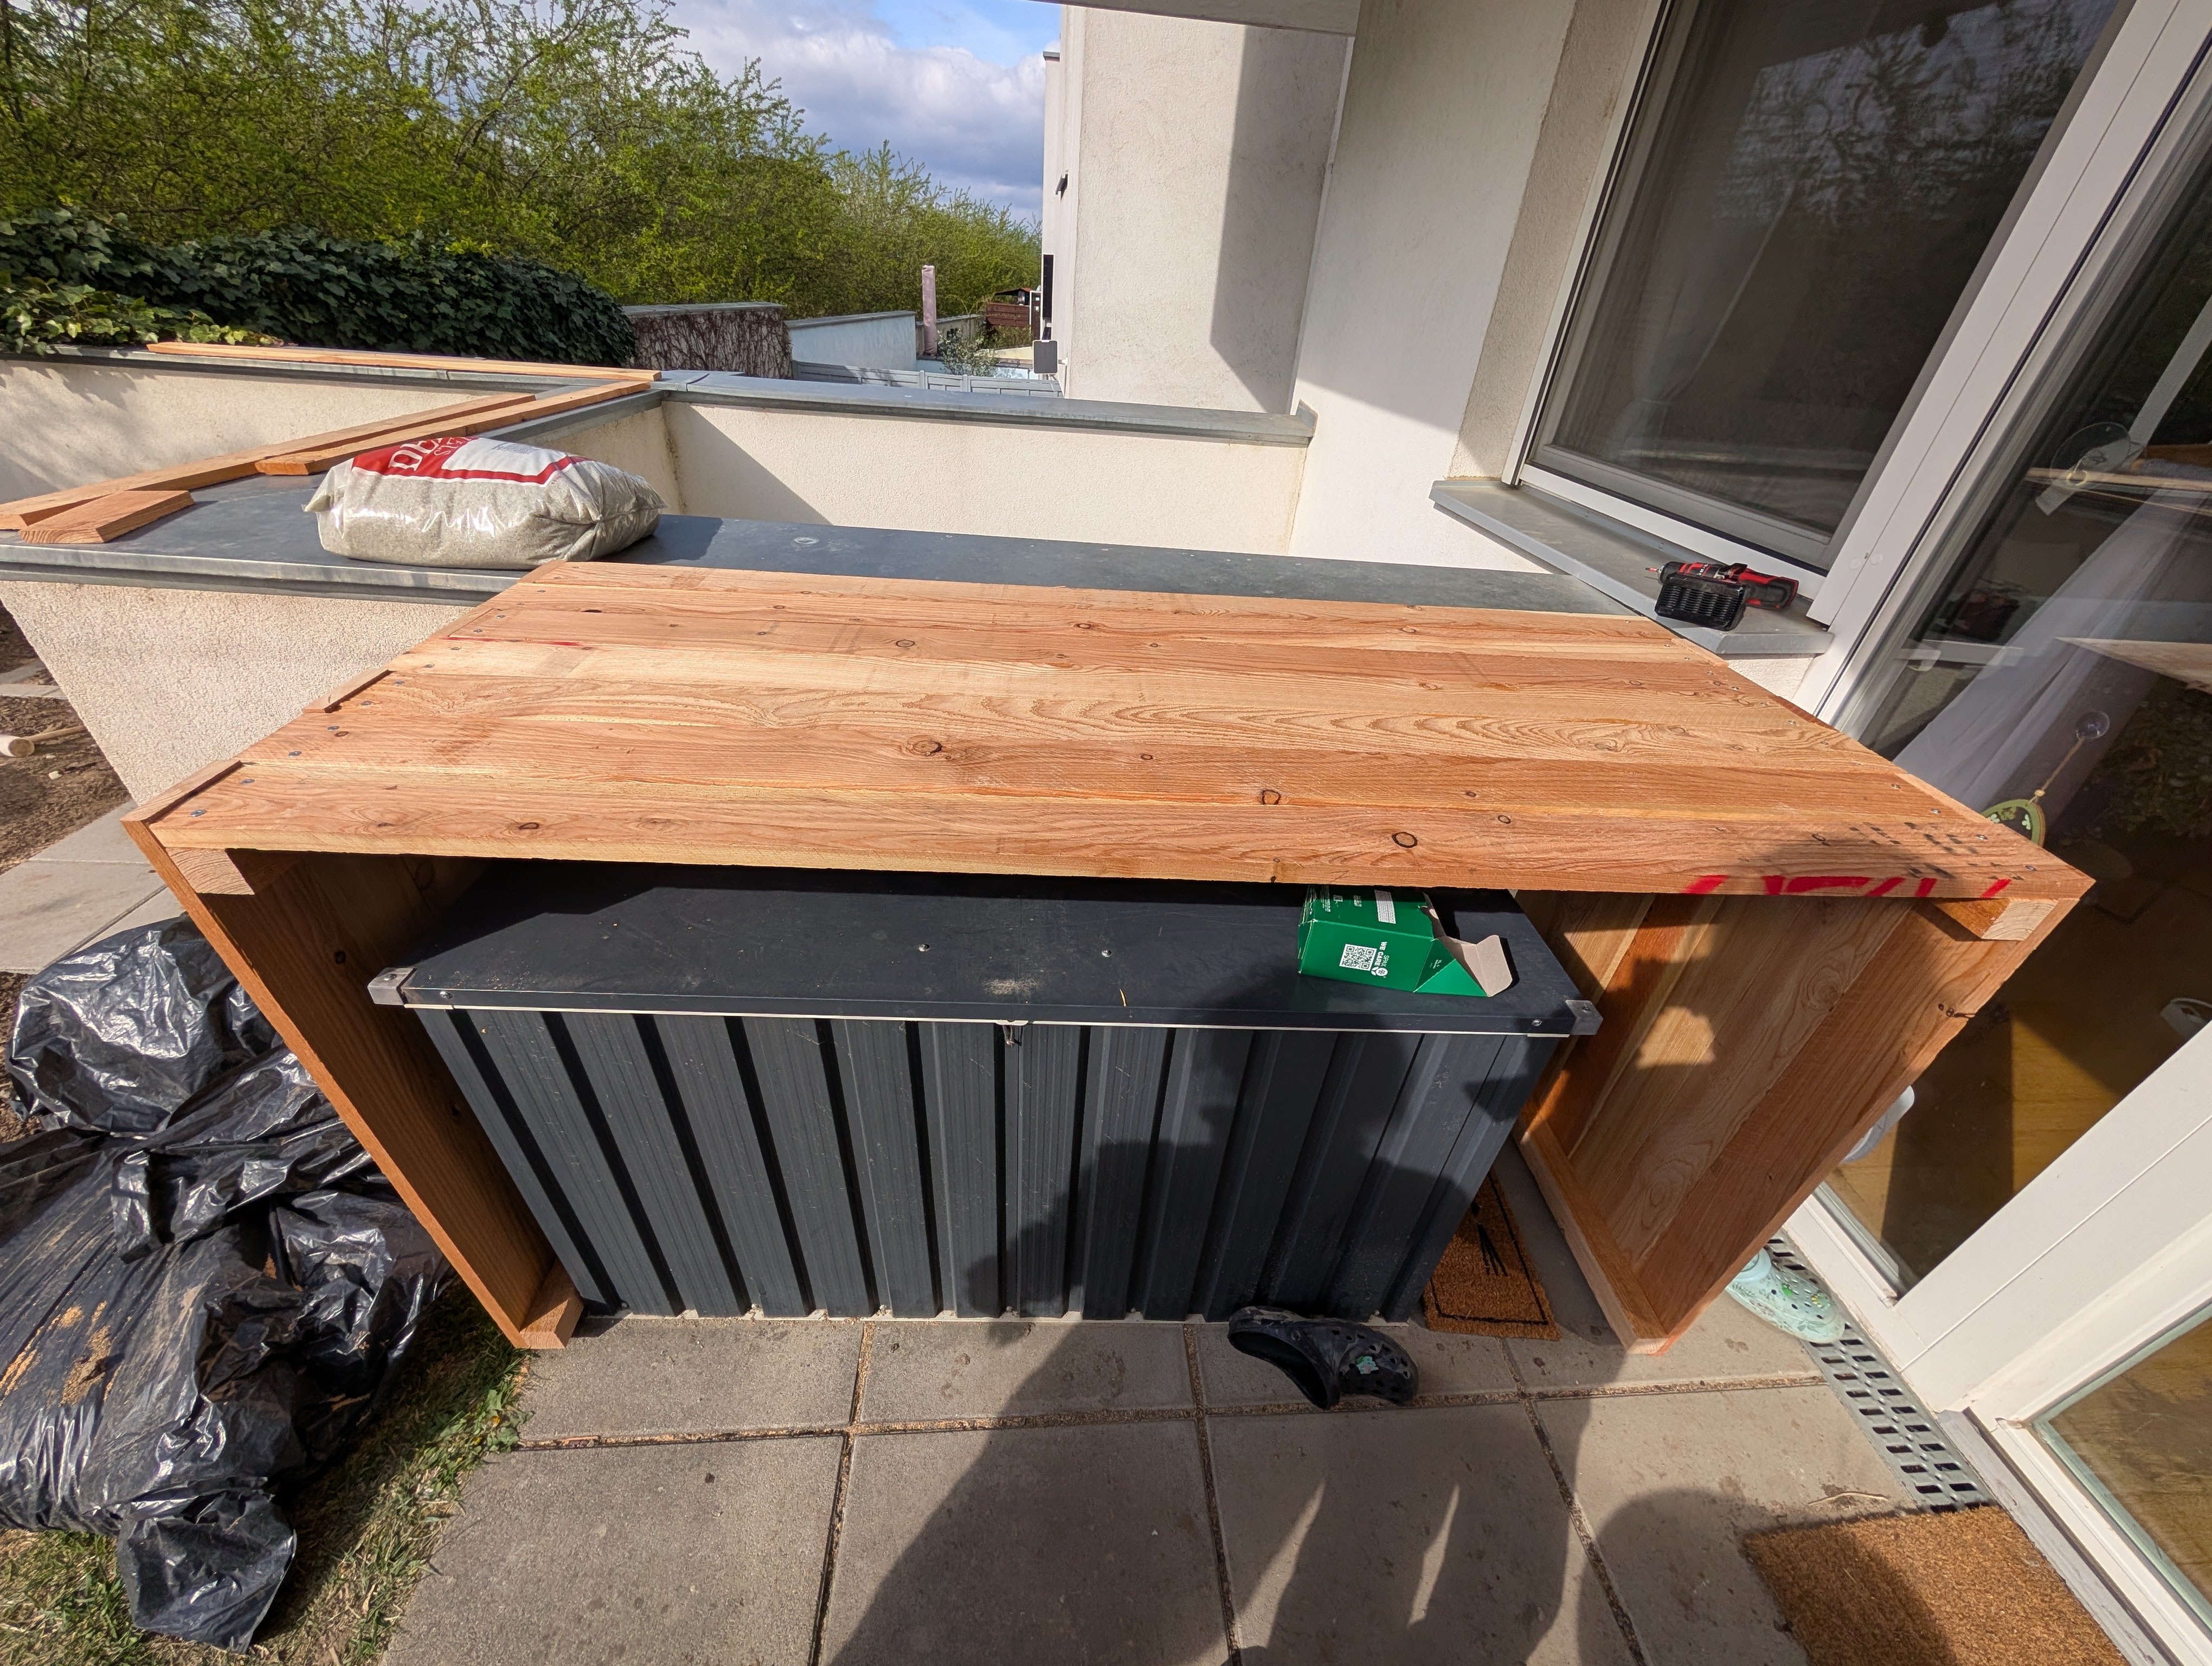
The sides fit together reasonably well and soon, our first planter was in its place 🥳
We tacked on pond liner on the inside to protect the wood and put in a section of steel rope in the middle of the long side to prevent everything from bulging out once filled.
Putting this together went faster than expected so we got a head start on the small planter by measuring and cutting the wood for the small planter.
the small one
This was the part I dreaded. The smaller planter has an angled wall, shares a wall with the first one and is not even square. My wife did the hard work of measuring, cutting and grouping everything together while I pre-drilled everything, making sure the screws wouldn't meet in the corner posts.
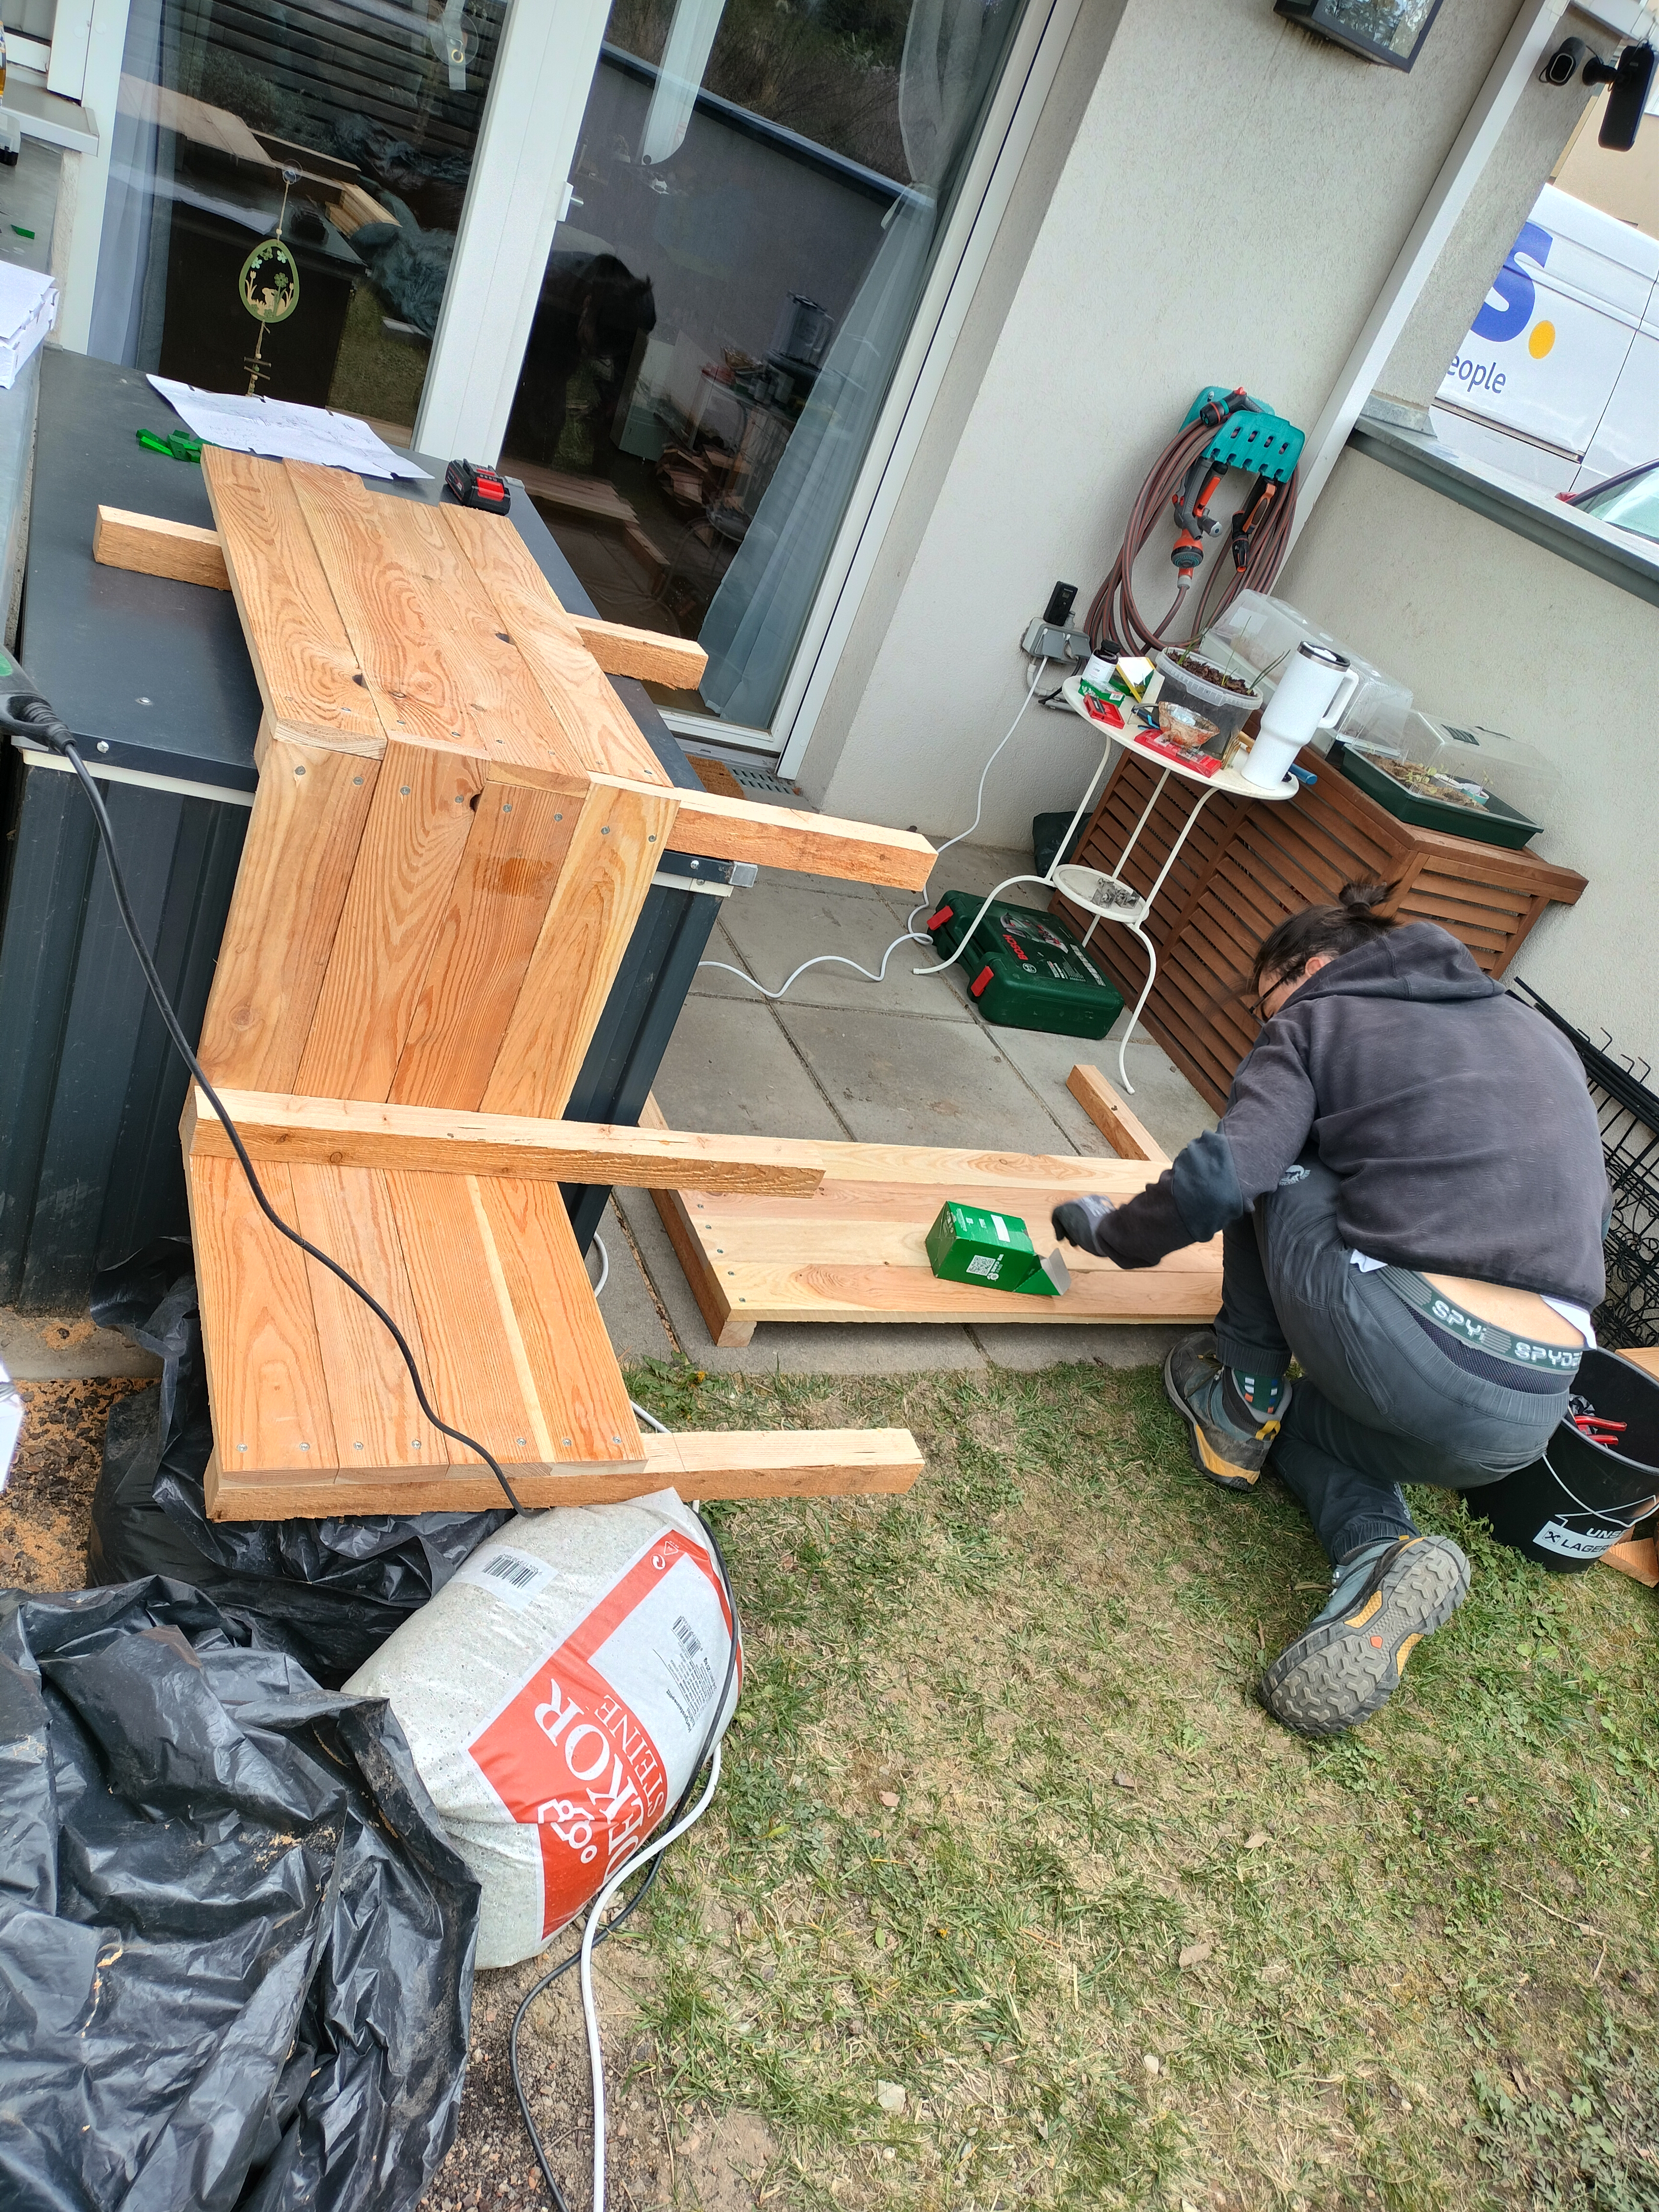
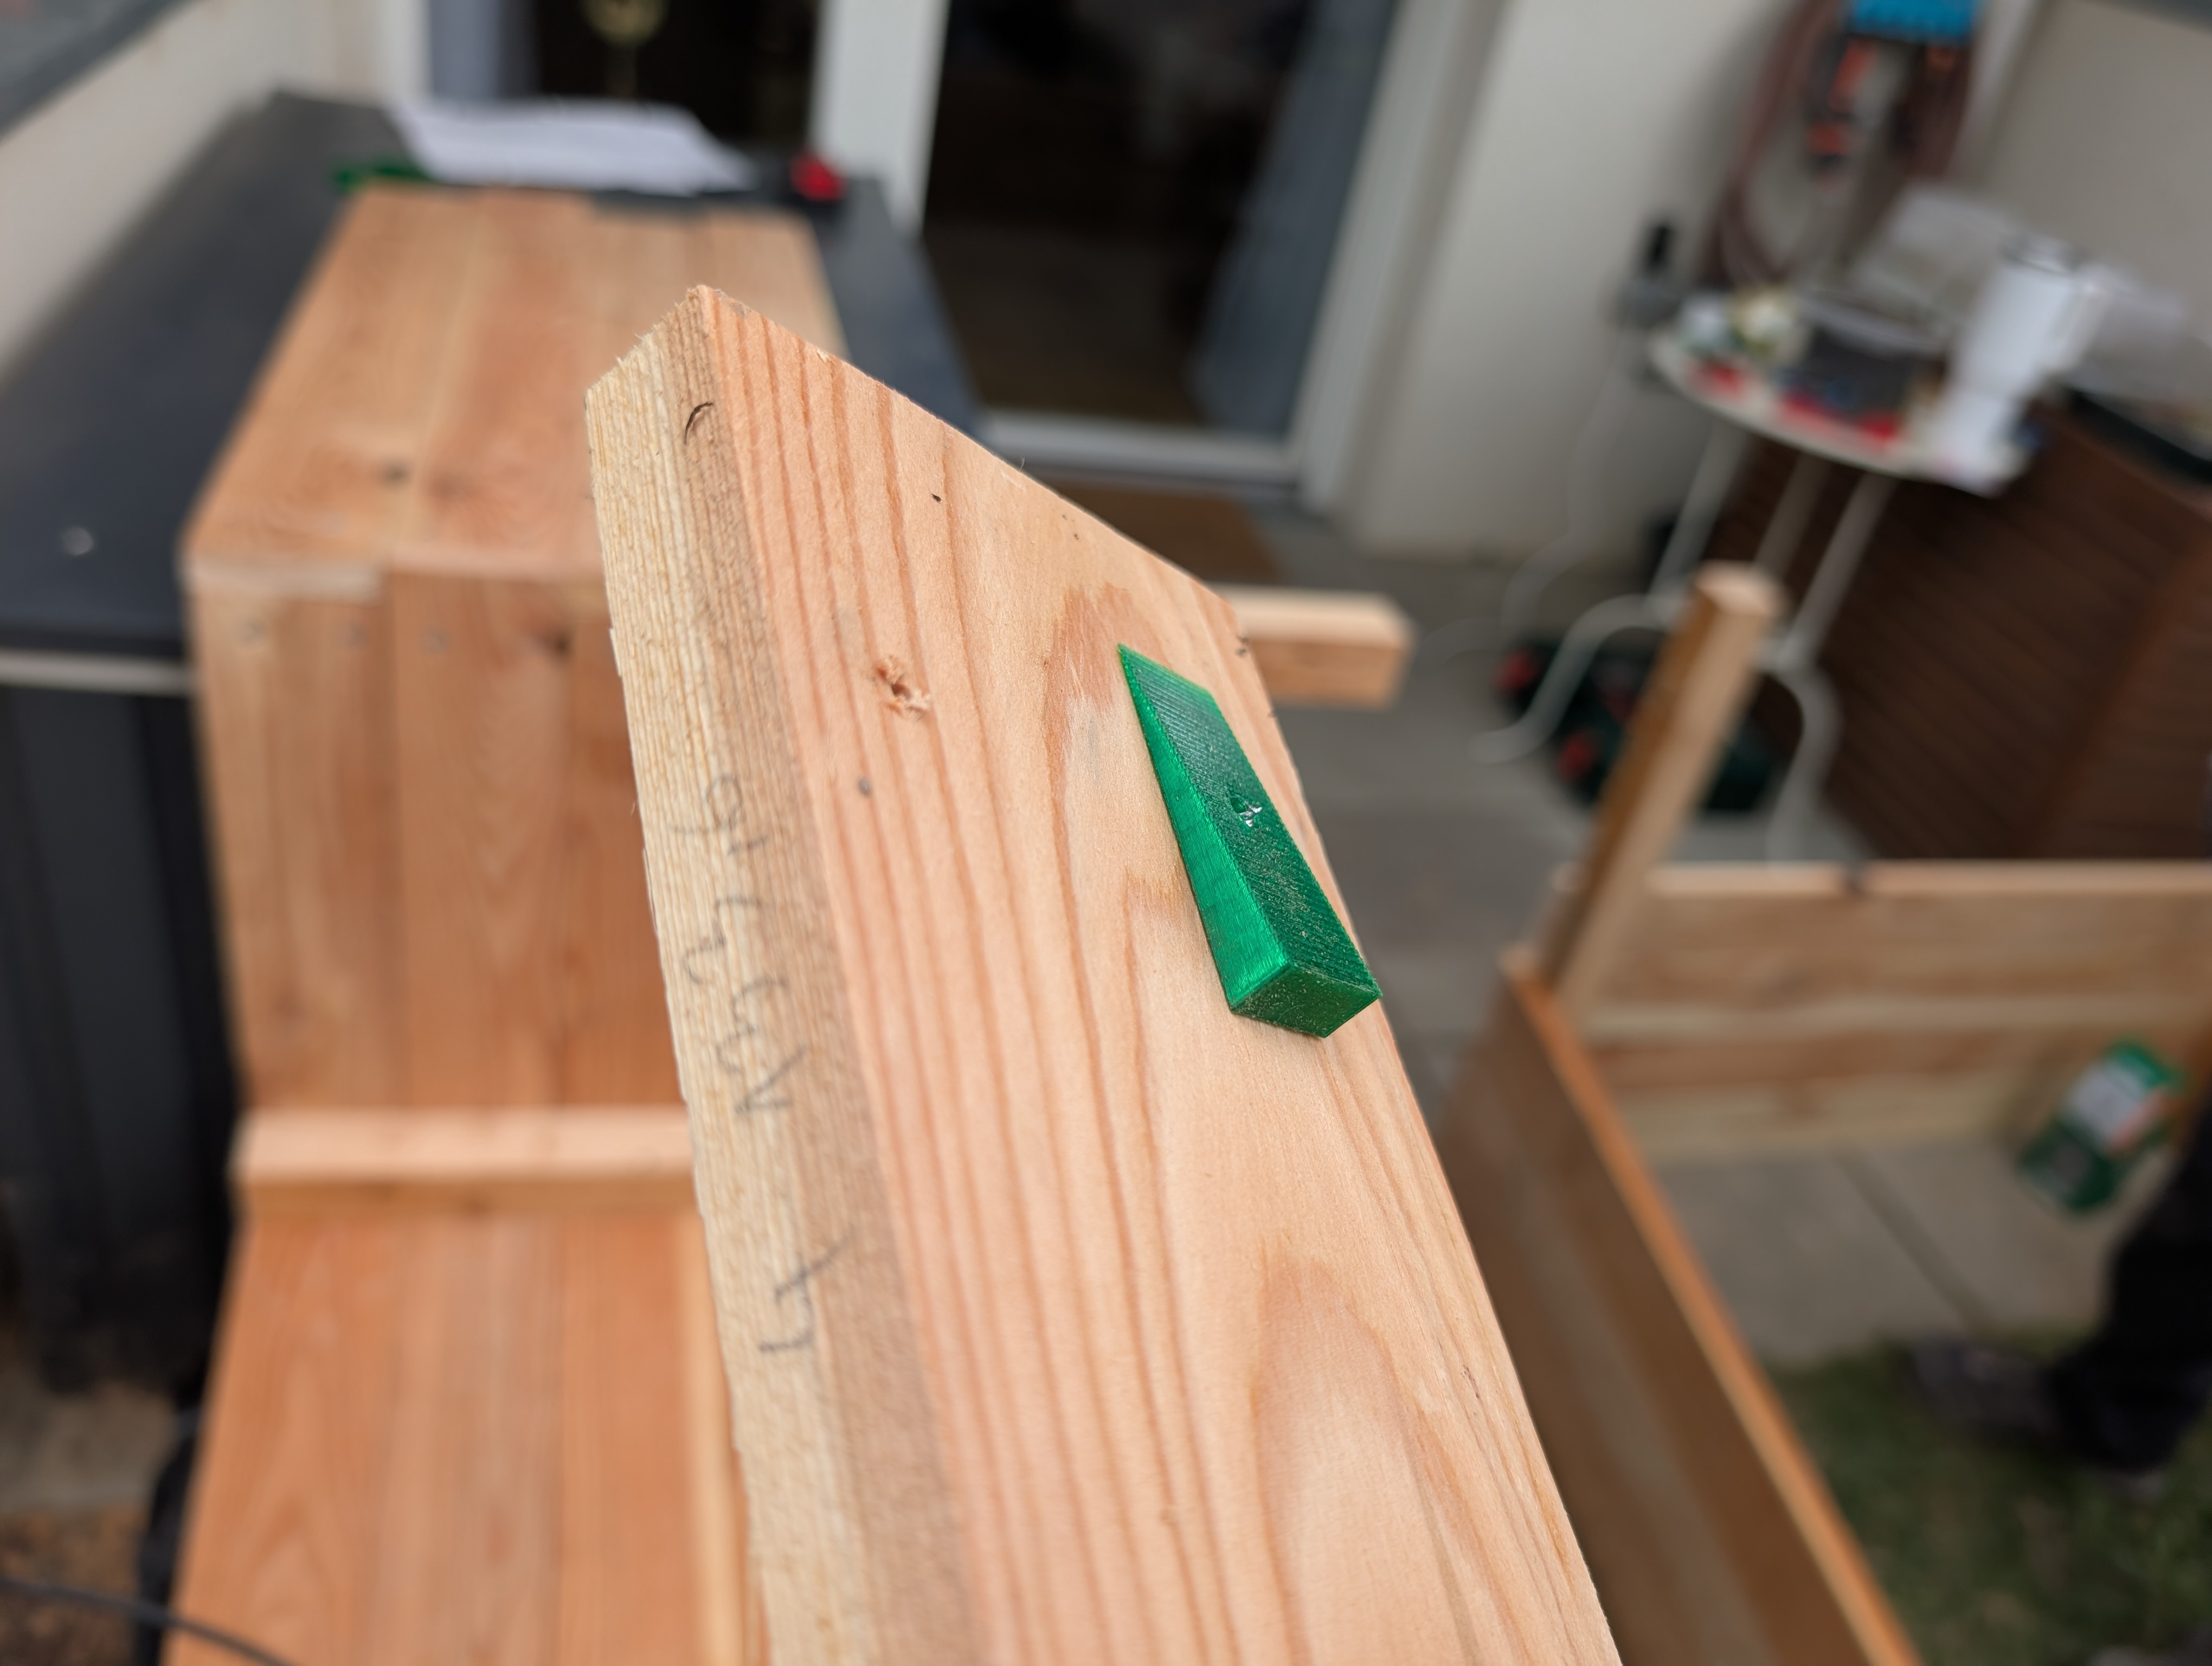
Once everything was ready, we had to find a way to constrain the angled wall. The initial design called for even more angles but we compromised by keeping the front facing corners to 90° which left us with one wall at 100° and 80°. The clean solution would be cutting the corner posts to those angles but our small jigsaw wouldn't be up to the task. What we came up with was to use 3D-printed jigs to screw in the posts at 10°. My quick CAD model turned out pretty well, even though I miscalculated the position of the screw hole (it shouldn't be dead center but slighty offset to adjust for the angle).
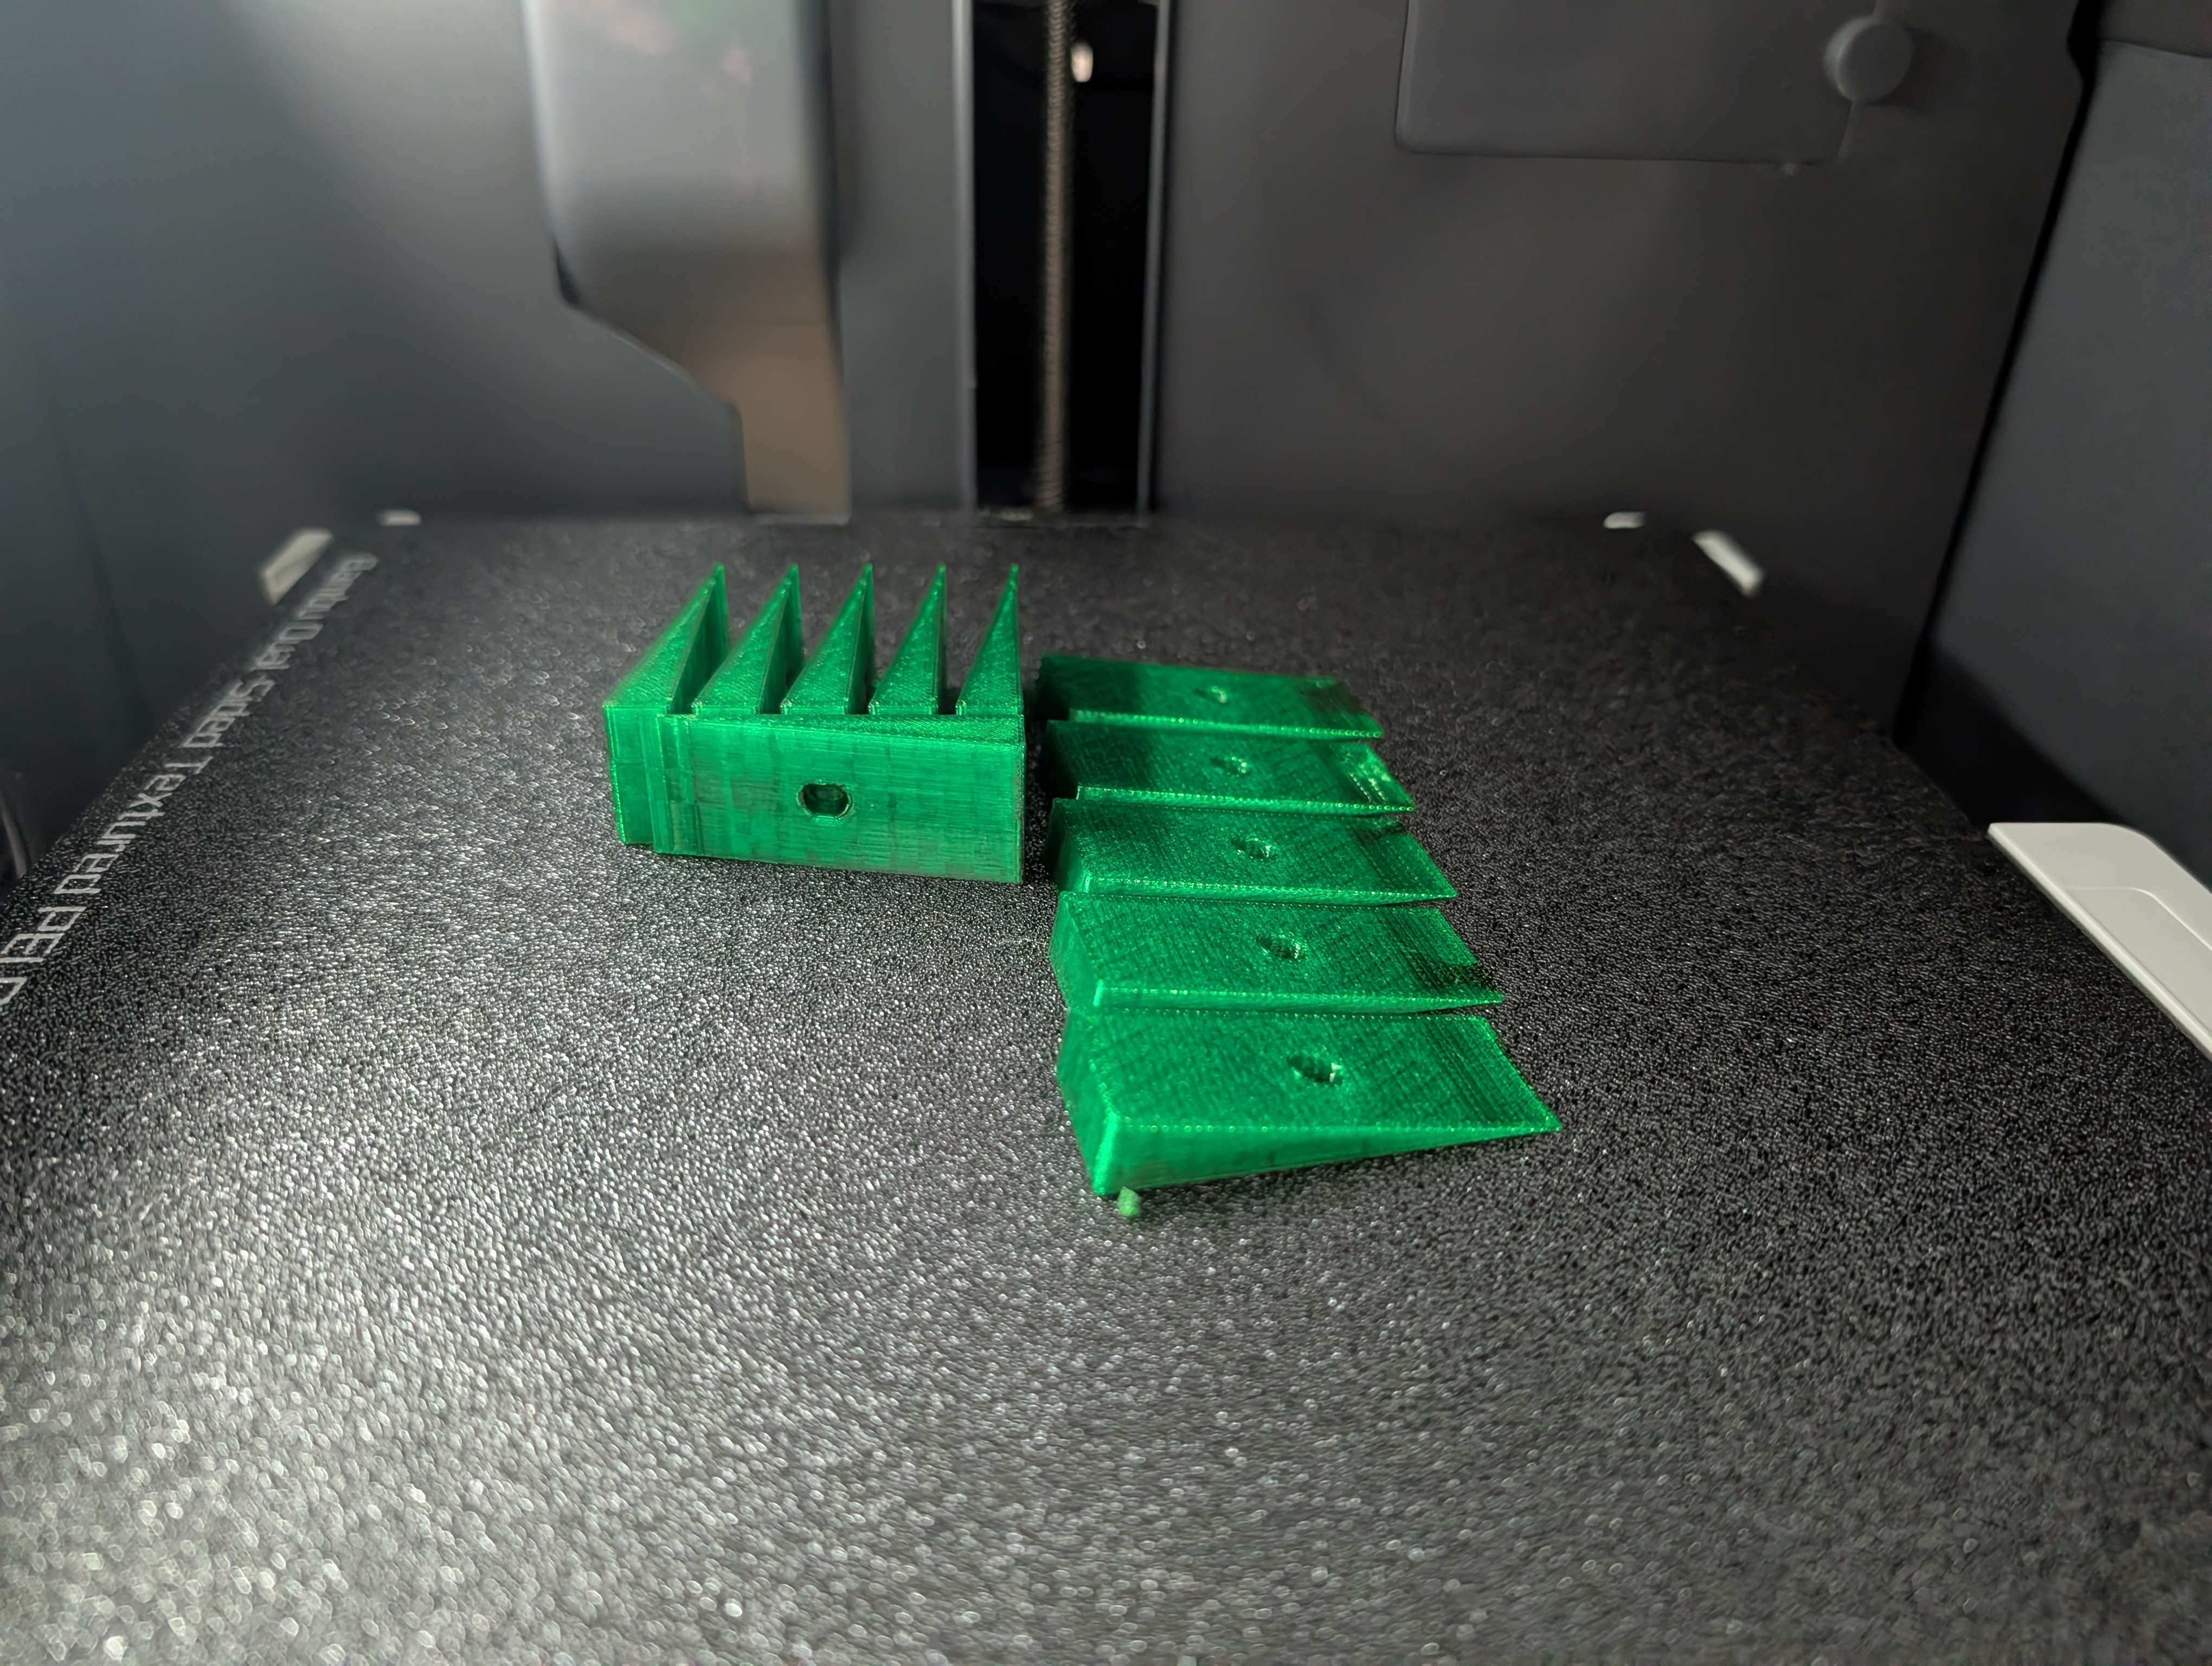
We screwed together everything else first as we wanted to be flexible in case this didn't work out. In the end our approach worked out fine, but not perfect. The misaligned screw hole caused the angles to be slightly off so it took some force bolting it in place to the other planter.
topping things off
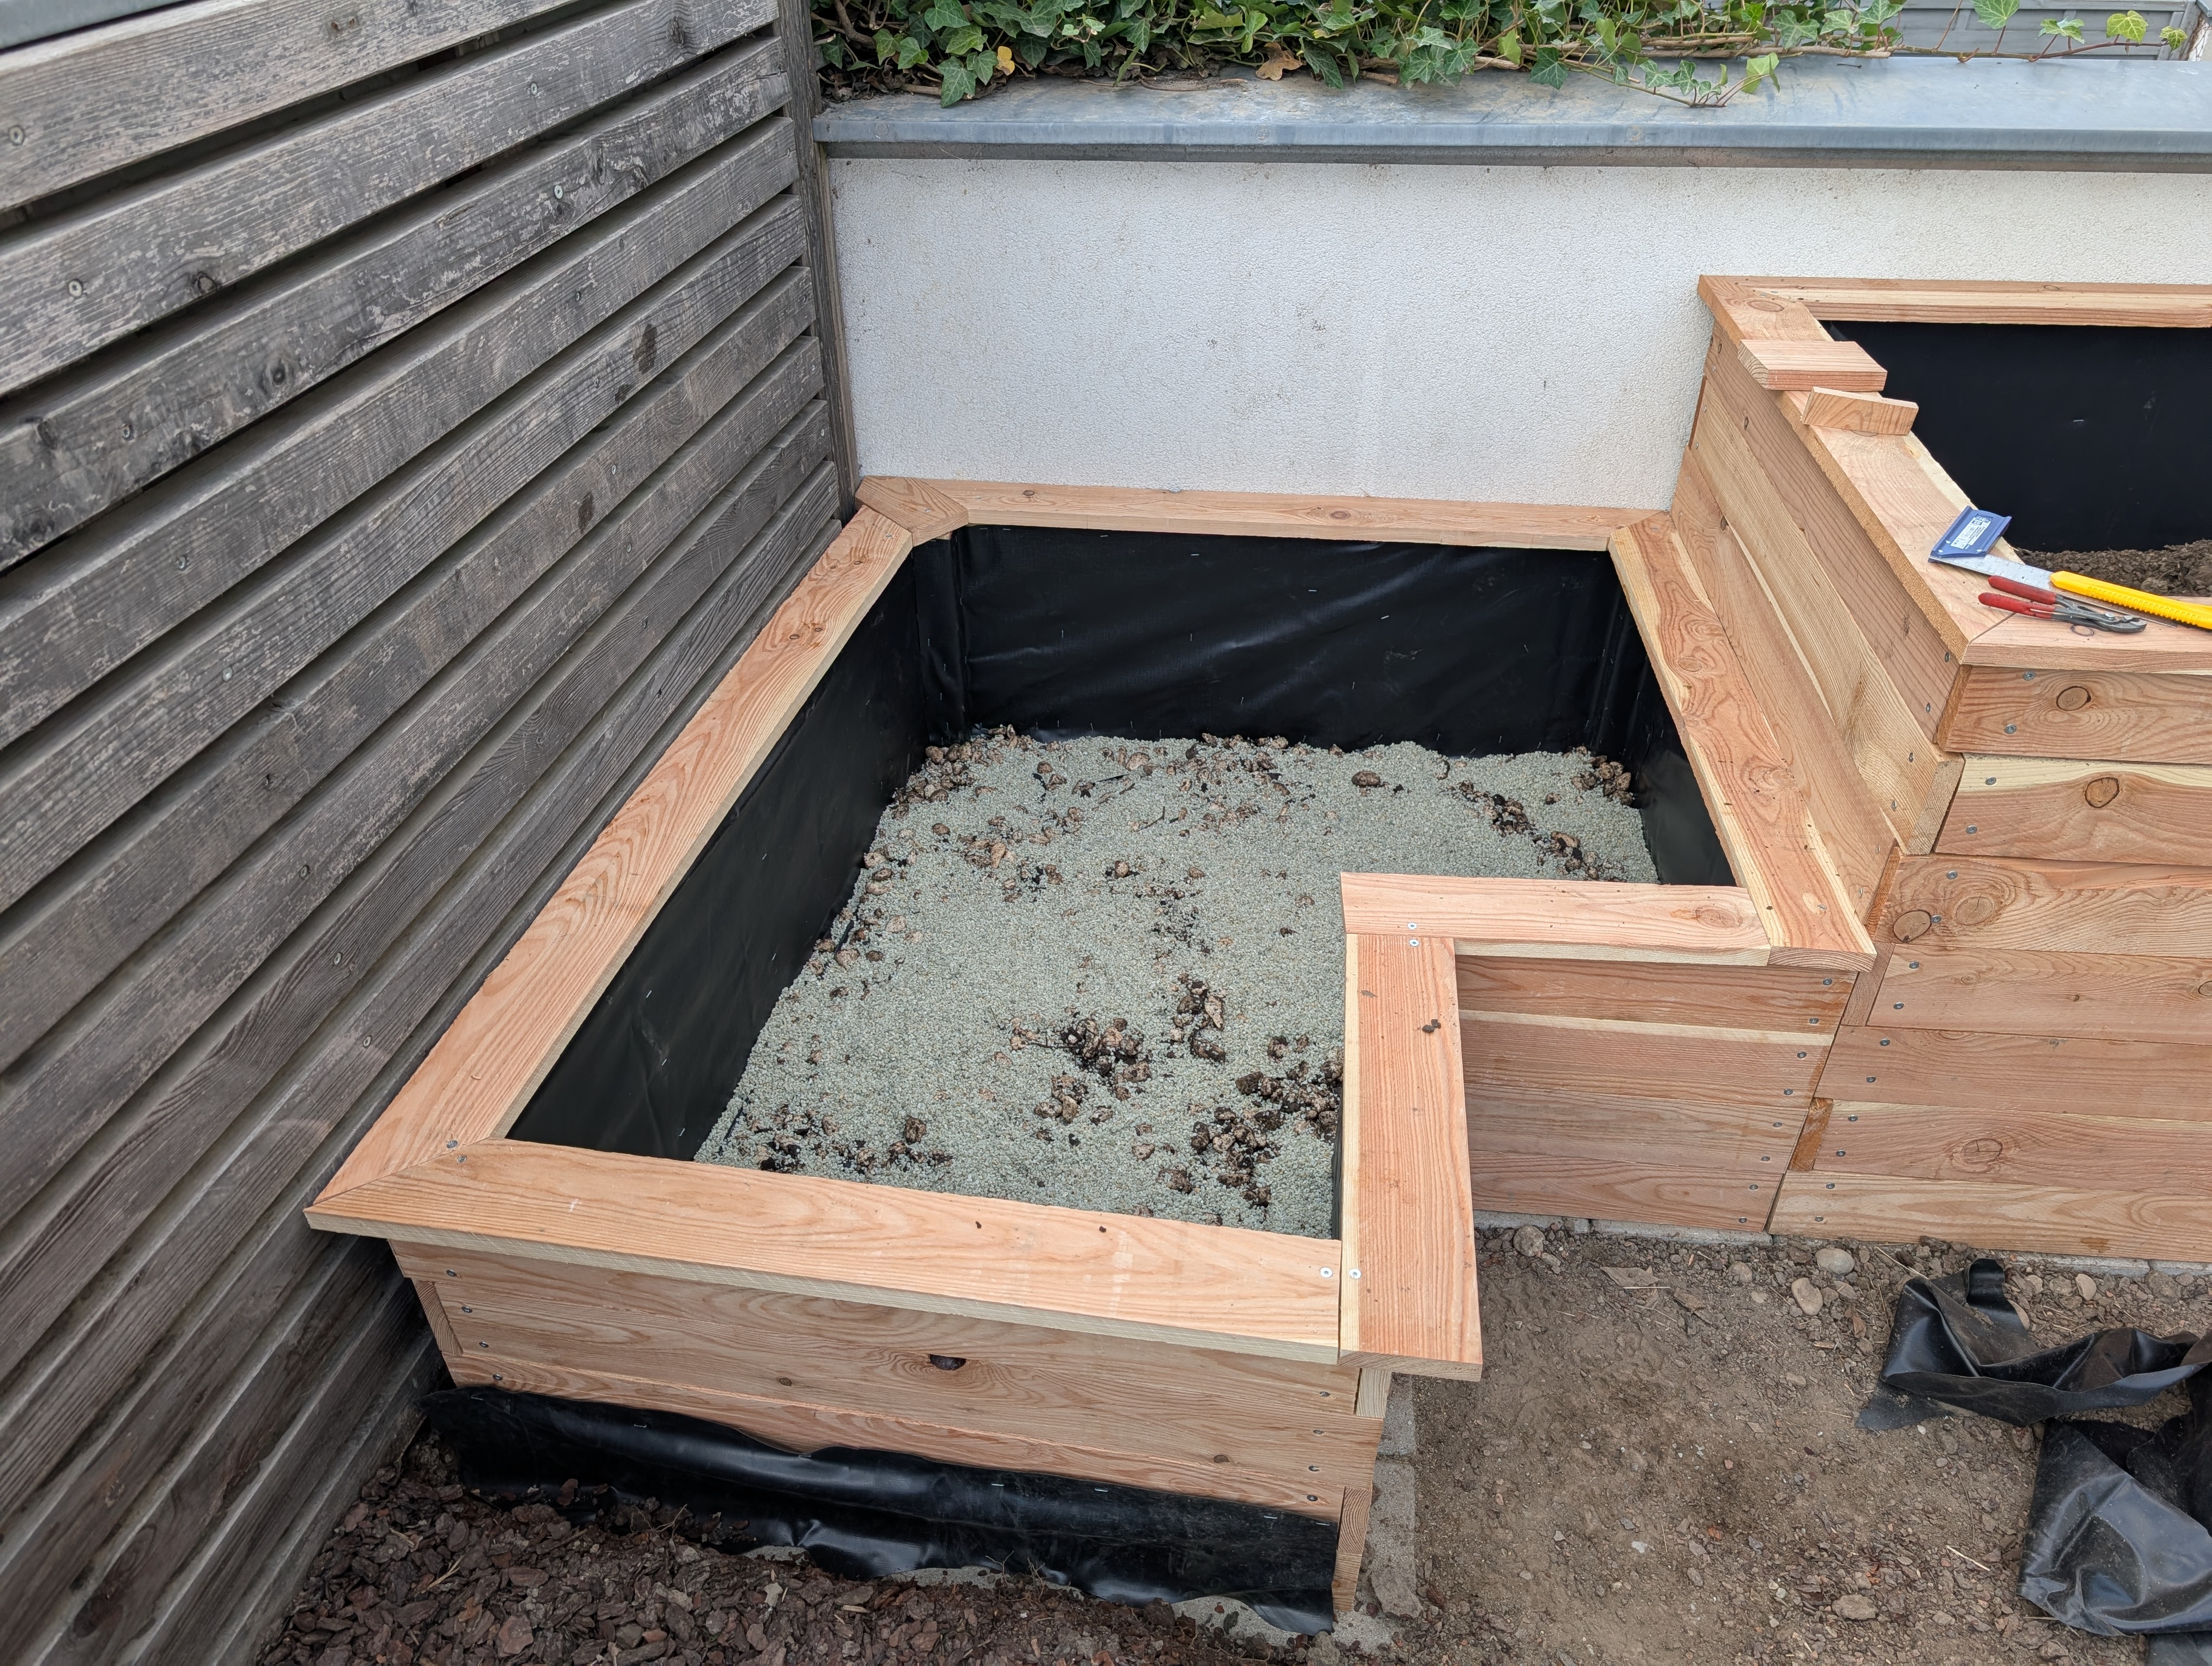
Our design called for a topper to have a bigger surface area on the top to lean on and to make things aesthetically pleasing so we got to work on this in parallel to the small planter (if you noticed it already finished in previous pictures, this is why 🤫). As even our square planter is not 100% square, we couldn't rely on the cad dimensions and re-did the calculations with real measurements. The easiest way to get clean corners was to cut the short sides first and transfer the line onto the longer plank, resulting in good enough corners.
The small planter was yet again more complicated as we needed to make sure the topper covers all corner posts. In the end, we had to compromise again and get rid of some diagonal corners, use some corner braces & even put in an extra piece in the rear left corner as the angles didn't work out in our favor.
While not perfect, we're still happy with the result and it even looks somewhat intentional.
young, dumb and full of dirt
The last thing to do was filling this thing. Our first layer consists of stones that we had kept from the original garden design. On top of this, we placed tree trimmings and mulch (also things we saved while restructuring the garden). Since we wanted to re-plant the grass anyways, we cut off a layer of grass and placed it evenly across the mulch layer. A few days later, my father-in-law dropped off 800L of fresh soil from the hardware store. Initially, we considered taking the free compost soil from Vienna's waste disposal services but were told that this earth isn't good for growing food. We ended up using most of it with some left for the rest of the garden.
was it worth it?
In the end we paid €350.5 for the entire thing. We also had to buy some tools we didn't have before (e.g. a spade, a good power drill etc) but as those will be useful for future projects I didn't consider them part of the cost.
Everything we used is listed here:
| Item | Cost [€] |
|---|---|
| Wood (Planks & Posts) | 140.00 |
| Pond liner | 43.86 |
| Screws | 29.68 |
| Pavement stones | 17.50 |
| Steel rope & mounts | 29.27 |
| Soil | 86.90 |
| Gravel (for foundation) | 3.29 |
| Total | 350.5 |
So was it worth it? The most similar commercially available planter is €184.99 at the time of writing and thats only for the square planter. Even though it's not as high, the smaller part uses roughly the same amount of wood so I'd double this price to arrive at a "retail estimate" of €369.98 for just the planter. The tiles for the foundation and the soil to fill it isn't included in that price. It also doesn't have a nice topper 😎.
We put in a lot of work into building this but I don't think it was much more than assembling a pre-built set. As mentioned in the beginning, the most time consuming part was laying the foundation which needed to be done in either situation. Building this ourselves from scratch also meant that we could tailor this to our specific needs and it really feels great to have built something just for us.
So I'd say yes - it was worth it!
But this wouldn't have been possible without the help of our friends and family so I want to say thanks to. my dad & leon for helping to rehome the old trees and cleaning out the garden, Kristof for lending us his car while he was on vacation as well as my in-laws for helping with the wood & soil - this would have been soooo much harder without you!
And if you've reached the end (or just scrolled down to see if it's worth it), here's a picture of the finished & filled planter in all its glory:

I'll follow up with greener pics once things are actually growing in here :)